Garden beds can simply be described as the solution to growing more plants in less space but in order to do that we have to know how to build some first, including knowing what to put on the bottom of a raised garden bed.
Once we’re done covering the materials that go on the bottom of a raised garden bed, we’ll also shortly cover all the other things you need to be aware of when it comes to raised-bed gardening.
Table of Contents
What to Put on the Bottom of a Raised Garden Bed: Best Materials
The basic methods of building a raised bed are quite simple and that’s what I intend to do in this article. We’re not going to get too complicated by covering a multitude of materials to put on the bottom of a raised garden bed.
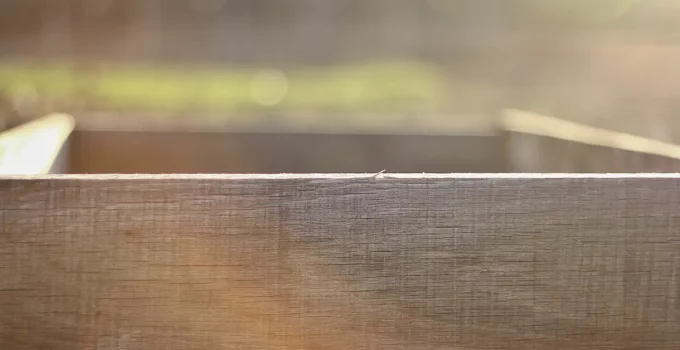
The bottom of a raised garden bed is not as important as what goes on top of it. The mix of topsoil/garden soil and compost that you use to fill up the bed is what really matters because that’s the component that’s going to feed the plants.
There are 2 basic methods to build a raised bed. Depending on which one you’d prefer, you’ll quickly get your answer to what to put on the bottom of a raised garden bed.
1. Use topsoil at the bottom (dig method)
If the soil where you want to place the raised bed is of good quality, then there’s no point in wasting it.
The dig method of building a raised garden bed is the most basic method of building these things and I really prefer it.
The steps are:
- remove the topsoil where the garden bed will be placed and set it aside
- mark the perimeter of the bed with string
- if you’re building it from wood, which is cheap and easy to buy, you’ll also need retaining stakes that are 2 x 2 inches wide
- bang the stakes into the 4 corners with a sledge hammer
- on the sides, place stakes every 5 feet – the stakes should be driven about 12 inches into the ground
- now, all you have to do is to attach the wooden boards to the stakes – use galvanized screws
- get that topsoil that you removed at the beginning and add it to the bottom of the raised garden bed – that’s what you’ll put on the bottom of a raised garden bed and it’s totally free
- if you removed grass together with the topsoil, just lay it out with the grass upside down – it will root eventually
- to fill up the rest of the garden bed you can use a mix of 50:50 topsoil and compost
- if you don’t have any topsoil to mix in with compost or you can’t find to buy any topsoil, you’ll have to buy garden soil, which might be a mix of topsoil, peat moss, sphagnum moss and maybe slow release fertilizer) – don’t mix potting soil in because it’s too fluffy
The soil should end up being about 1-3 inches below the top of the bed.
As levels decrease, you can top it off with much or compost – add mulch or compost each year to improve the soil.
2. Use cardboard/newspapers on the bottom of a bed (no dig method)
If the soil where you live is not great at all, you shouldn’t use it to fill the lower section of the raised garden bed, as I explained above.
Instead, you can lay out cardboard over the place where you want to place it.
The steps are:
- mow the grass/weeds as close to the ground as you can
- cover the area with cardboard – make sure to use clean cardboard, remove any tape or staples because those won’t decompose into the soil like cardboard or newspapers do
- you can also use newspapers if you have a lot around the house
- the cardboard/newspapers layer should measure about 6 inches to make sure that the weeds don’t break through
- add a layer of 4-6 inches of compost over the cardboard/newspapers that are now at the bottom of the raised garden bed
- then pour over a mix of 50:50 topsoil/garden soil and compost
Besides the 50:50 topsoil/garden soil and compost that you can use for growing the plants in, there’s another mix that you can experiment with: 40% compost, 40% topsoil, 20% aeration (perlite, pumice, rice hulls).
I also recommend watching this YouTube video on how to fill a raised bed. It will provide you with all the needed information.
Best Raised Garden Beds
I definitely recommend making your own. That’s why I wrote this article on what to put on the bottom of a raised garden bed. Hopefully, I showed you that it’s quite easy to make one.
Nevertheless, there are also raised garden beds that you can buy. I have to tell you though that these are not cheap. Plus, it’s still a matter of spending money on topsoil or garden soil and on compost.
I think these products can be a nice option for a larger balcony or for a small patio where you can’t build bigger boxes to grow plants in.
1. Foyuee Raised Planter Box with Legs
This is one of the best that you could buy if you don’t care that it’s on the smaller side. Well, the price is pretty high but that’s to be expected.

The box only holds 2.5 cubic feet soil.
You won’t be planting that many plants in one but it’s decent for growing about 10 strawberry plants in the same space. It’s also awesome for herbs as you can grow a large variety of them. And it works for larger plants, like tomatoes or cucumbers or peppers.
The good news is that many user reviews state that it was easy to assemble.
It’s an elevated raised planter box with legs. It also has 2 wheels if you want to move it around.
There is a is a drainage hole in the middle of the box and drainage line to prevent waterlogging. If you’re placing it on a balcony, you’ll have to put some tray under the hole to catch excess water. You can also use it indoors.
It’s made of stable galvanized steel raised with anti-rusty grey coating, it has the potential of lasting a long time.
Where to Buy?
Check Price and User Reviews Here
2. King Bird Raised Garden Bed
This is the type of bed that goes directly on the ground and it’s very big.

Its dimensions are 68″x 36″x 12″. I thing the 12 inches height is awesome. It definitely offers plenty of space for the roots.
This model holds 17 cubic feet of soil so be prepared to spend quite a bit on filling it. Well, you’ll be able to grow a lot of plants in a single huge box like this one.
The manufacturer mentions that you won’t need any tools for installation. There’s a video with instructions that you should absolutely watch if you want to get it right. Moreover, one user mentions that you should use lots of screws if you want it to last for many years to come.
For such a large box, the price is pretty good.
It’s made of galvanized steel with upgraded multilayer galvanized paint for rust prevention.
Where to Buy?
Check Price and User Reviews Here
Hugelkultur: a different kind of raised garden bed
Hugelkultur translates into hill culture.
It consists of mounding up rotting logs, branches, and sticks. These are then covered with soil and they’ll end up looking like mini hills.
Crops will be planted both on the sides and on top.
It’s an interesting concept that relies on the decomposition of wood. This will transform into an environment that holds and releases moisture and nutrients. It can also create a decent amount of heat for early crops.
Thus, this time, rotting logs, branches, and sticks are placed on the bottom of a raised garden bed.
You can build it as high as up to 6 feet, with steep sides of about 45 degrees.
How to build hugel beds:
- remove the turf and save it for later
- dig the remaining soil to a depth of 12 inches – save this one, too
- in the pit, stack logs and timber, the largest going at the bottom – use rotting and unrotted timber
- the more timber you add, the more nutrients and water will provide
- add wood until it’s about 3-4 feet above ground
- cover the wood with the removed turf and soil from when you dug the pit
- cover the sides and the top with a mix of topsoil and compost, just like we do for transitional raised garden beds
The Advantages of Raised-Bed Gardening
Raised beds are certainly not a modern concept. But more and more people are paying attention to all these advantages that this method offers.
Before going into all that, let’s talk about the major disadvantage.
The thing is that raised garden beds require an initial investment that might be too much for some budgets. Quite a good deal of money will have to be spent in the beginning.
You can build them using lumber, bricks or rocks. For most people, these will have to be bought.
Moreover, if you don’t make your own compost, that’s another substantial cost.
The bright side is that you can look at it as an investment because they will last plenty of years.
Grow more
Densely populated areas are becoming especially interested in this horticultural method because it’s among the only ways to grow plants in confined spaces.
The other is hydroponics but it doesn’t involve any soil and it’s considerably more expensive in the beginning.
The third option is to grow a limited number of vegetables, herbs, leafy greens, and some fruits indoors in containers. You can grow strawberries vertically indoors but also tomatoes, peppers in pots, some citrus trees, and even pineapple plants.
The first major advantage of garden beds is that you can grow plenty of vegetables or flowers or whatever plants you want in very small spaces. That’s the main reason for choosing this planting method.
Quality of soil
The second is that you can control the soil and everything that goes in that box, all those components that will contribute to growing and supporting the plants as they mature. A clear example of this advantage is our talk of what to put on the bottom of a raised garden bed.
If you live in an area where the soil holds water and needs to be drained in order to allow prosperous gardening then you’ll be happy at the chance to control the quality of the soil by building your own raised garden beds.
The same goes for those leaving in areas with poor soil or soil that is unsuitable for growing certain plants.
All that can be easily manipulated in a raised bed.
It offers plenty of tailoring possibilities, without incurring too much spending.
You can control weeds much easier. You definitely won’t have to work as much to keep your rows free of weeds.
The need for anti-slug and anti-snail measures should also be reduced since the plants are further off the ground.
Root development
Thanks to their depth, raised-bed gardening offers another useful advantage: the roots have room of development.
Moreover, the soil dries out less quickly. It’s also not as prone to temperature fluctuations.
Easy access
Due to the fact that this method contains the words raised, it means that it can allow people access to gardening without bending too much. The alternative is to use kneeling pads, especially if you’re working at ground level.
Another thing is that you can create separate spaces for different vegetables. Tomatoes can go in their own box, cucumbers in another, and so on.
Moreover, you can design how the beds are going to look and where they’re going to be placed. If you want to integrate them into the landscape, you definitely can. There are so many design ideas that it’s hard to settle on one.
Plus, only the first season is the hardest. Once you gain a bit of experience, everything will turn out well for the next season and these will be distant days, when you were wondering what to put on the bottom of a raised garden bed.


