The hydroponic drip system is one of the most popular for commercial growers. It’s absolutely amazing for growing all kinds of plants from just water and nutrient solution, with a growing medium to support the crops and absorb the water and nutrients.
I will create a full guide on the hydroponic dripper system, explaining in detail which components go into building one, which are the advantages and the disadvantage, and who should attempt to build this type of hydroponic system.
In short:
If you want to grow crops on an expanded scale, you will be interested in the architecture of the drip system hydroponics. This type of setup can also be called nutrient delivery in substrate system.
However, if you want visual guides, I recommend going on YouTube because there are plenty tutorials there that show how household growers have gone around to building one. This tutorial is a nice example of how you can build a hydroponic drip system at home.
Table of Contents
Hydroponic Drip System: How it Works
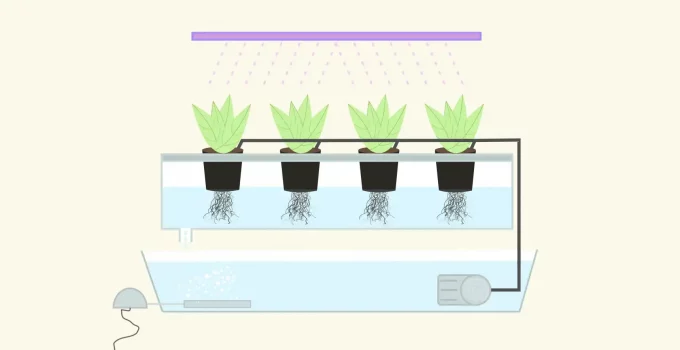
The dripper system is different from all the other big 5 through one major factor: the water and nutrients drip on the plants from above.
To be more precise, the liquids drip on the growing medium because you can’t have plants and their foliage being wet all the time.
So, the grow bed is not flooded with liquids but the liquids are dripping from the drip lines.
You will have a small line of hose or an angled dripper near each plant.
This is an efficient way of delivering nutrients slowly and directly to the root zone.
Drip irrigated substrate systems can be placed outside but rain can dilute the nutrient solution and it can keep the foliage wet for long periods of time, which can lead to fungal and bacterial disease.
It is very similar to the ebb and flow (flood and drain) system. The difference is that the grow bed is not flooded from below but a timer controls the water pump to drip the nutrients from above.
They’re very similar because both use timers. A NFT system doesn’t need one.
That’s why I think that those who have built an ebb and flow will be able to build a hydroponics drip system the easiest.
The Two Types of Drip Systems
There are actually two types of hydroponic drip systems:
- recovery drip system
- non-recovery drip system
There is just one difference between them: the recovery type collects the surplus nutrient solution that flows down to be reused.
Recovery Type
It’s more efficient and more cost effective but it also needs more maintenance and constant monitoring.
You need to monitor nutrient levels and the solution’s pH.
If you have experience with the NFT and ebb and flow systems, you know what I’m talking about because those two also collect excess liquids to reuse them.
It decreases water consumption and the spending for nutrient solution.
Non-Recovery Type
The non-recovery doesn’t collect the water and nutrients that run off.
On the other hand, the timer needs to be more precise, to ensure that the plants get the needed nutrients without having excess runoff. The cost will increase if there is a lot of waste.
Since the excess water and nutrients are not collected, the non-recovery set-up doesn’t require as much monitoring.
This is the first choice you have to make if you decide that the hydroponic drip system is the right one for you or maybe it’s part of your evolution in growing many plants hydroponically.
Hydroponic Drip System Components
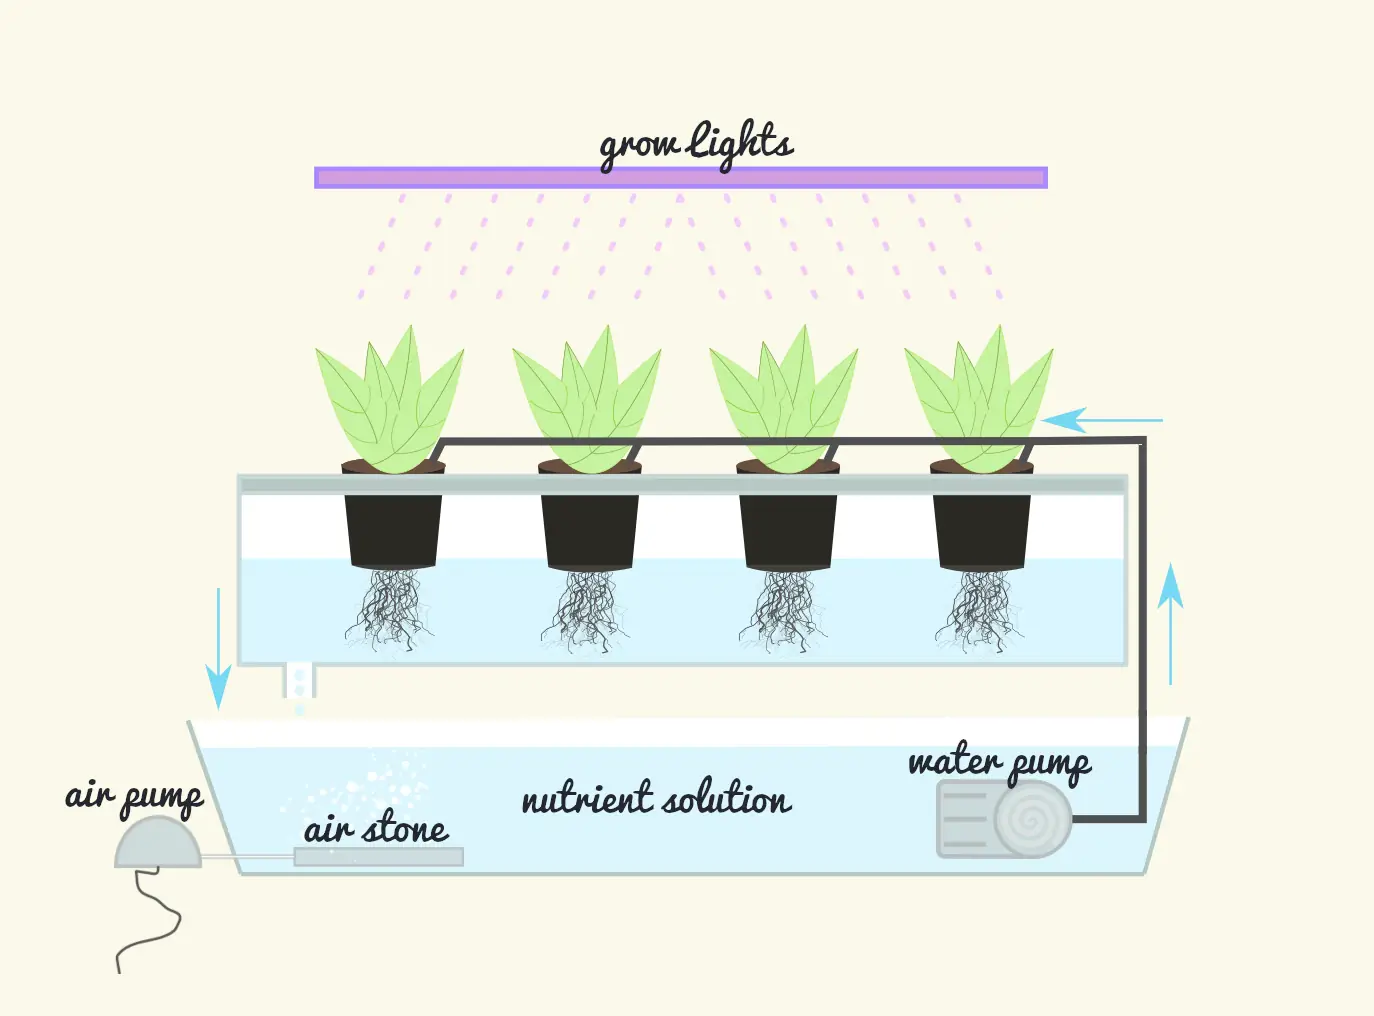
The main components are:
- reservoir
- grow tray with growing medium
- nutrient solution
- water pump
- water filters – furnace filters/mesh filters to keep the growing medium in place and prevent it from clogging the drippers
- air pump and air stone – to aerate the nutrient solution
- drip manifold (main irrigation line or ring)
- drip lines (spaghetti tubing)
- return drain – tubing for recovering the excess water and nutrients (also called runoff tube) fitted with a filter to prevent the draining of growing medium
- timer
- grow lights (full spectrum LED grow lights or HIDs if you have a large budget)
Reservoir
This is where water, nutrient solution, water pump and air stone are placed.
It needs to be large enough to provide water and nutrients to the plants. If you’re growing a small number of plants, you don’t need a really big reservoir.
For a beginner, you can even start with an old aquarium or a storage plastic tote as a reservoir. Most use large storage totes.
If you’re going with the storage tote as reservoir, 18 to 30 gallon storage tote is good for beginners.
Grow the plants in
- grow tray of any size or shape
- PVC pipes are a good option for growing plants in single rows
- 5 gallon buckets (if you’ve built a 5 gallon DWC system, you already have the basis for how buckets work for hydroponics) – each plant will have its own bucket if you’re growing bigger plants or 2-3 plants per bucket for smaller ones, like herbs
Growing medium
The best choice is a growing medium that lets the water drain slowly but that doesn’t get too soggy:
- peat moss
- coconut coir
- rockwool
Hydroton will require a lot more dripping because it doesn’t hold on to water as well as the other 3 grow media.
Nutrient solution
Mineral-based hydroponic nutrient solutions work best because organic formulations are prone to clogging.
Water pump
Check out my post on the best hydroponic water pump if you want a starting place for your options. Those are all submersible water pumps.
Drip lines
We have two different lines: drip manifold (mainline) and drip lines.
The mainline tubing is obviously thicker because the smaller drip lines connect to it.
You’ll have to use splitters for splitting the tubing as much as you want.
Each plant has its individual drip line – 1/8 inch drip line tubing can be an option.
Each drip line has an angled dripper or emitter that is positioned right above the growing medium – you can use 2 angled drippers per plant as backup in case one gets clogged.
You can clean the clogged drippers with vinegar.
How to Do the Most Basic Hydroponic Drip System
You can use the bucket as a reservoir and place a net pot in the lid but that means that you’ll only be able to grow one plant at a time because the water pump will be sitting at the bottom of this bucket.
- drill a hole in the center of a 5 gallon bucket lid – this hole will hold the net cup (it can be 4-inch hole for a 4 inch net pot or 3 inches for a 3-inch net cup)
- next to it, drill a 2-inch hole
- drill another hill a couple of inches down from the rim of the bucket – big enough for the flex of the water pump to pass through
- attach 1/2 inches tubing to the water pump (18 inches long)
- attach a 1/2 inches or a 1/4 inches reducer to the open end of the tubing
- another 1/4 inches tubing is attached to the reducer (4 inches long)
- the water pump is placed at the bottom of the bucket and feed the power cable the hole
- the reducer and tubing are introduced through the 2 inch hole in the lid
- place the lid on and push the tubing back into its hole so that the reducers sits flat on the top
- use a clip to place the 1/4 tubing (4 inches long) so that it flows into the growing medium
- use a timer for the pump
5 Gallon Buckets Hydroponic Drip System
One of the easiest hydroponic drip systems that you can build at home is the one that uses 5 gallon buckets for the plants to grow into instead of hydroponics grow trays (a grow bed for all the plants).
You still need a reservoir to store the water and nutrients and to place the water pump and the air stone into. The reservoir can be another 5 gallon bucket or a storage plastic tote.
5 Gallon Buckets to Grow the Plants In
You can use black pain to paint the outside of the bucket to keep the light out. Over that, you should paint one or two coats of white paint so that the water doesn’t get hot. Do the same for the reservoir.
The first thing you must do in order to transform a 5 gallon bucket into a place where plants are grown in growing medium is to put the drain in.
The drain will let the excess water and nutrients return to the reservoir.
Flip the bucket upside down to put the drain into place. Any excess liquids will be return to the reservoir through this drain.
You’ll be using a thru hull fitting. Pre-drill hole, insert thru hull, and tighten it in place. Drill the hole for the thru hull closer to the edge than the middle so the bucket can sit safely, even when elevated.
Take a furnace filer and place it inside the bucket over the thru hole to keep the growing medium from entering the reservoir.
You can transform in this way as many buckets as you want and add them to the hydroponic drip system.
The Reservoir
The reservoir can be a storage tote container with a lid for a bigger capacity.
Cut a hole in the lid to feed the cording of the water pump and for the hoses.
Connect the tube to the hose and feed it up to the bucket. Use tape or a clip to keep the tube in place, feeding water and nutrients directly into the growing medium.
You can create a loop that sits inside the bucket. This loop can have little holes in it so that it acts as tiny sprinklers over the growing medium.
That way you don’t need to use drippers or emitters.
Attach this tube to the main tube. This is the feeder tube.
Attach the draining tube by hooking the tubing through the thru hull and run it back into the reservoir. You need to have the buckets in which the plants are growing elevated so that the excess liquids return to the reservoir through gravity.
If you want to increase the number of buckets use T connectors.
Take the tubing that runs out of the reservoir and connect it into a T-connector. Now you have two tubes and you can connect two buckets.
Take each of those two tubes again and connect T connectors and now you have four tubes for four buckets.
What You Can Grow with the Hydroponic Drip System
It offers amazing versatility in terms of which plants grow well in this system. It’s no wonder that it’s the preferred option on the commercial scale.
You can use this set-up to grow anything from leafy greens to herbs to tomatoes, peppers, cucumbers, strawberries, watermelons, cantaloupe.
It can even work for onions and radishes and pumpkins.
The Advantages
- you can feed your plants small levels of water throughout the day or constantly (most people use a timer so the constant feeding of water and nutrients is not that frequent)
- since plants only receive small amounts of water and nutrients, there’s no risk for them to drawn in water (like with the more basic DWC set-up)
- it’s easy to control: if too much water is used, it can be dialed back
- if the drip is going on for too long or is too short, the timing can be adjusted
- one of the best hydroponic systems for large-scale growing
- popular with growers of hydroponic tomatoes and peppers
- great choice for growing larger plants
- if you want to add another plant to your crop, it requires almost no extra money or effort
The Cons
- the grower needs to establish the right level between too much water and too little water – one can lead to rot, the other can lead to dried roots
- the timing needs to be more accurate than what an ebb and flow requires
- this finding of middle ground for water and nutrients levels is the difficult thing for the hydroponic drip system
- this is not exactly a set-up for beginners
- it might be too complex for small-scale crops
- the angled drippers can get clogged up – you can use 2 drippers per each drip line to have one as backup in case of clogging or anything else happening
- high-quality water might be needed to prevent the clogging with salts, sediments
- the need to establish an equal volume of nutrient solution delivered to each plant – it’s only a problem for large crops not when you’re growing just a few plants
- hydroponic drip systems are very expensive if you want to buy a ready-built one
The main takeaway is that the hydroponic drip system can have a lot of benefits in terms of costs in the long run and versatility in growing anything from herbs, tomatoes, leafy greens, cucumbers and fruits but it requires a bit of technical knowledge and prior experience with hydroponics.


