Are there any special best microgreen trays that you should buy? Does it matter which growing trays you’re using based on whether you’re growing them in soil or growing microgreens without soil?
Or maybe you can use any plastic trays to grow microgreens, maybe something that you already have in your house so that you don’t spend the extra money.
That’s pretty much what we’re going to be talking about in this article on the best microgreen trays. We’re going to analyze all our options. Then you’ll be able to choose what works best for you.
If you just want something that will serve as a good project for your children, I recommend checking out my picks for the best microgreen growing kits.
Table of Contents
7 Best Microgreen Trays
If you want to know exactly why I chose these 7 models as recommendations for the best microgreen trays, check out the section of this post on how to choose the best trays for microgreens.
You’ll see which are the criteria for choosing them and you’ll know how to choose the best growing trays for your household or business.
1. Bootstrap Farmer Store 1020 Extra Strength Trays: Best Microgreen Trays
If you’ve watched any YouTube channels on microgreens, you’ll probably hear that a lot of those creators use these trays from Bootstrap Farmer Store.

There are two options for the 1020 Bootstrap Farmer Store growing trays: no holes or with holes. The price is the same for both options, which is not exactly cheap but they get a bit cheaper if you get the 30 pack.
The main reason for picking these as the overall best microgreen trays? Top-notch quality. It’s as simple as that but not that easy to find in the world of growing trays.
Bootstrap Farmer Store 1020 Extra Strength Trays are actually designed for repeated use and abuse. The manufacturer states that they have tested their trays with over 50lbs weight without breaking.
They’re made from extra thick, BPA-free, food safe plastic. All their trays, no matter their dimensions, are made from this type of plastic.
At 1.8 – 2.0 mm, the thickness is impressive . It’s exactly what you should be looking for if you care about buying top quality.
The outer dimensions are 21.06 x 10.81 x 2.5 inches; they’re 2.5 inches deep.
Where to Buy?
Check Price and User Reviews Here
2. TO Plastics 1020 Plant Trays: Cheap Microgreen Trays
These 1020 trays have no drainage holes.

But if you’re looking to buy in high quantity for a price that will end up being close to $1 per tray, then you should check these ones out.
You really can’t beat that quality for that price, as far as I can tell.
You’re not going to get the sturdiest no holes growing trays for microgreens but you’re not going to get some flimsy ones, either.
Once again, the cheap price will make them worth it. And if you handle them with care, you’ll be able to get multiple uses from these best microgreen trays.
You can choose from the following buying options: 25, 40, 50, and 75 pack.
The 25 pack is the most expensive option and the price decreases considerably for the 40 pack. It’s more advantageous to get a bigger quantity.
The dimensions are: 21.37 x 11 x 2.44 inches. TO Plastics 1020 Plant Trays are made in the USA and, in the end, I would qualify them as being durable.
Where to Buy?
Check Price and User Reviews Here
3. Germinator 6 Microgreens Growing Trays: Durable Microgreen Trays

Let’s get a few things out of the way so that you know in an instant if these are the best microgreen trays for you or not:
- there are no holes – the watering from the bottom will have to be done carefully if you’re using soil but they work nicely for those growing microgreens hydroponically on hemp mats or coco coir or rockwool mats
- the measurements are 15 x 9.3 x 1.7 inches – these are not your standard 1020 trays, much smaller since they only measure 15 inches in length so, you might have to cut the hemp mats but it will work if you’re using coco coir compressed blocks
If those features don’t bother you, you will be happy to know that these growing trays are really sturdy.
When it comes to durability, this is what we’re talking about.
The plastic is 1.5 mm thick. That’s pretty nice.
You also get 6 trays for a pretty nice price. They’re not the cheapest but the price is still pretty good.
If you want treys that will last and you’re not bothered by the unusual size, these ones from Germinator are a really good choice. But that’s a bit of a funny name, isn’t it?
Where to Buy?
Check Price and User Reviews Here
4. Bootstrap Farmer Store 1010 Seed Tray: Best Microgreen Trays
First of all, don’t order the white option for microgreens. Go for black. I’m not entirely sure why they have the white option.

You can choose from these several buying options: 10 pack, 20 pack, 60 pack.
They’re quite deep trays, their exact outer dimensions are: 10.75 x 10.25 x 2.38 inches.
1010 are the width and length for the interior.
The price is just what one would expect, not cheap but not too expensive, either.
There are no drain holes, these can be used for hydroponics but also for soil cultures if you water them carefully from the bottom.
What makes the Bootstrap Farmer Store 1010 Seed Tray some of the best 1010 microgreen trays is their sturdiness, their durability.
Some might call them even close to unbreakable, which means that you’ll get plenty of uses out of them. And that’s what matters.
Where to Buy?
Check Price and User Reviews Here
5. Bootstrap Farmer Store 1020 Mesh Tray: Pretty Expensive
I love these mesh trays from Bootstrap Farmer Store.

Overall, I’m a big fan of this manufacturer because it makes really sturdy, durable trays for microgreens. The type that you will get to use for years to come without problems.
That applies to this 1020 mesh tray, too. It’s just great from a qualitative point of view.
This type of 1020 mesh tray is also absolutely perfect for soil cultures. One of the best microgreen trays for soil, without a doubt.
If you buy the 10 trays pack, the price per tray goes down by $1.
So, what bothers me?
There’s no bottom tray. You will have to get 1020 no holes growing trays to use as bottom trays.
Pay close attention to the outer dimensions when you’re trying to find the perfect 1020 no holes: 21.25 x 11.25 x 2.5 inches.
The 1020 no holes trays from the same manufacturer will fit but those are not cheap either.
Where to Buy?
Check Price and User Reviews Here
6. LeJoy Garden Seed Sprouter Tray

This is not your usual tray for growing microgreens. And it’s definitely not fit for starting a business.
This kit just addresses people who want to grow their own sprouts and a whole array of immature vegetables but without spending too much time learning about the whole process, without the complications.
If you’re looking for an uncomplicated way to grow microgreens for beginners, this might be the kit your are looking for. It’s absolutely great for beginners who don’t want to make any mess in their house.
The LeJoy Garden Seed Sprouter Tray is perfect for small places and for growing microgreens indoors, especially if you get some grow lights.
What it offers
- for a pretty high price, you get just one tray
- the tray comes with cover (dome) for moisture preservation and a faster growth rate – it’s nice that it has a cover because it’s able to justify the higher price, it costs more than what we’re used to when talking about the best microgreen trays
- it measures 13.4 x 9.84 x 4.72 inches – you’ll see why it needs more depth, I am slightly disappointed that it’s not bigger, they could have made a 1020 version, too
- the tray comes with a white grid with small holes to help sprouts take root easily, the holes are also there to prevent root rot
- they’re called small holes but tiny seeds, like the ones for herbs and leafy greens will fall through – you will have to cover the white tray with 3-4 wet paper towels if you’re using small seeds or you can use a layer of soil
- so, 4.72 inches is the total depth – 2 inches for the white tray and 2.6 inches for the green container
- the green container is where the white tray is stacked and where you will be pouring water
- you can sprout both in water and in soil
- the good news is that it’s BPA-free plastic
- and it’s pretty sturdy, you’ll be able to reuse it plenty of times, maybe experiment with different seeds
- it works for all types of seeds
- there are instructions – that’s exactly why I said that it’s a nice microgreens kit for beginners, although you still need to buy seeds and grow lights if you don’t have access to about 4 hours of sunlight per day
Where to Buy?
Check Price and User Reviews Here
7. Sheing Seed Sprouter Tray 5 Pack

The cheaper alternative to the above seed sprouter tray is this one, which offers 5 trays instead of one. The difference is that there are no domes but you don’t necessarily need domes to grow healthy microgreens.
During the first 3-5 days when you’re keeping the trays in the dark, you can just stack them one on top of the other.
The one at the top can be covered with plastic wrap or a plastic sheet or any plastic tray that you have in the house.
The idea is the same: these are best microgreen trays for beginners, a sort of kit without seeds.
So, you’ll receive 5 trays, each measuring 9.8 x 12.8 x 1.8 inches. They’re all green, which is another difference from the usual black growing trays that most of us use.
Each tray has a white mesh tray that goes inside and that’s where the seeds are sown.
They do include germinating paper. It can be used for all types of seeds but it’s especially good for small seeds.
The holes are not small enough for herbs or leafy greens seeds. They might fall through without a cover. It seems to be a common feature for this type of microgreen kits.
If you don’t have any more germinating paper, for small seeds, you will need to cover the mesh with a few wet paper towels.
The manufacturer states that this is BPA-free plastic. The plastic is quite durable, it’s not cheaply made.
Where to Buy?
Check Price and User Reviews Here
Best Microgreen Trays Buying Guide
Let’s see which are the things you need to pay attention to when shopping for the best growing trays for microgreens.
Growing microgreens can be turned into a profitable business but you need to choose the right supplies. According to microveggy.com, you can get a gross earning of $8.5 – $14.8 per 1020 tray. That’s impressive.
Size
When you’re shopping for the best microgreen trays, you mainly need to remember this term: 1020 trays.
1020 trays stand for: 10 inches width and 20 inches length.
These are standard but there can be slight variations in width and length, depending on the manufacturer. For example, you might get 21 x 11 inches, the variations in size are not that big.
The other popular option is 1010 trays: 10 inches width and 10 inches length.
When choosing the best microgreen tray there are a few general numbers to guide you:
- at least 20 inches long
- 1.5-2 inches deep – microgreens grow shallow roots, they’re immature plants so, there’s no need to use containers that are very deep
Do the best trays for microgreens need drainage holes?
Yes and no.
This is one of the most important questions to be answered. It depends on a number of factors. Let me explain by going into the process of how to water microgreens.
After sowing the seeds on soil or on soilless growing medium and throughout blackout time, you spray the seeds with water from above.
Once the trays are taken into sunlight or placed under grow lights, you will water the soil or the growing medium from below. You don’t water microgreens sprouts from above because it can squash them or damage them or they can wilt and grow mold if droplets of water are left on them.
If you’re growing microgreens without soil
You don’t need drainage holes.
You simply pour water into the tray and the hemp mats or coco coir compressed block or rockwool mats will absorb the needed water. The excess water will have to be removed from the trays.
If you’re growing microgreens in soil
Then you might want to sow the seeds on trays with drainage holes.
When the microgreens are taken into the light or placed under grow lights, the trays with drainage holes will be placed in trays that have no holes.
So, you’ll be using two models of microgreen trays.
The one with holes is where you place the soil and the seeds. The growing tray is placed in the compact one, without holes.
Why is that an option?
Because it makes watering microgreens in soil from below so much easier.
You just lift off the tray with microgreens, pour a small jar of water in the tray that has no holes, and then lower the tray with the sprouts. The soil will absorb the water from below. Check out this YouTube video to see how it’s done.
It’s very easy, even though you have to invest in two different sets of growing trays.
This method of using two different trays for soil cultures is mostly convenient for those who have a microgreens business.
If you’re just growing a few different types of seeds for your household’s consumption, you can just buy one set of growing trays without drainage holes.
When it’s time to water from below just power water gently at soil level in the corners of the tray. Gently push aside the delicate stems and water between them, as well.
Material
If you want to reuse your microgreen trays, you’ll want products that are made of durable materials.
You don’t want to end up replacing them a few times a year, which is possible, considering that a microgreen growing cycle only lasts 2-3 weeks.
You might spend more in the beginning but it can save money in the long term. If you’re starting a business these are things to consider.
Some manufacturers promise that their growing treys will last a lifetime. It’s a good reassurance when buying the best microgreen trays. But it helps to check some reviews from other users to see if they are indeed durable.
Preferably, they should be made of BPA-free plastic but the type of plastic they’re made from and how thick it is, that’s what makes the difference.
A 1.8-2.0 mm thickness is really good. But not all manufacturers informs us of this dimension. It’s usually length, width, and depth/height.
Price
The bad news is that durable best microgreen trays are not exactly cheap. The price can be around $4 -$5 per growing tray if you’re buying a larger pack. As we saw, if you’re looking for durability, they’re worth it.
The idea is to buy a set or two or more, depending on how many crops you want to grow at the same time, and use the same trays for years to come.
If you’re buying both no holes and with holes, the initial investment can be considerable.
I also recommended you a much cheaper alternative from TO Plastic. Those are no holes trays but the larger packs are really cheap. And they’re pretty durable. If you’re on a limited budget, you should check them out.
When growing microgreens in whatever medium you want, you just have to stack up the trays one on top of the other and then put an empty tray over the one with seeds that ends at the top. I’m referring to blackout time, which lasts 3-5 days and it’s done in a dark place.
On the empty tray at the top, you might also choose to place a weight, a brick. That’s usually done for plants that grow high, like sunflowers.
What I’m saying is that you shouldn’t buy trays with humidity domes. Those are expensive and you really don’t need them for microgreens.
Do we need lids for germination?
We talked whether we should be looking for the best microgreen trays with drainage holes or no drainage holes. The answer to that question depends on whether we’re growing in soil or without soil.
Now, let’s see if we need lids for germination.
We use lids when we germinate seeds for growing them in containers or in the garden. Does the same apply to germinating microgreen seeds?
Because most trays for microgreens certainly don’t come with any dome or lid.
Actually, things are totally different when germinating microgreens because we have the blackout time or blackout period.
If you’re using more than one tray, then you can the actual trays to put them one on top of the other to create the darkness that microgreen seeds need for the first 3-5 days after being sowed.
The actual trays when we grow the other microgreens are stacked one on top of the other because the blackout period doesn’t only involve germinating the seeds in darkness but a weighed object is used to cover the trays.
If you grow in just one single tray, then I recommend using a second empty tray with a weight added on top of it to cover the tray with the microgreens during those first 3-5 days.
So, the answer is that we don’t need lids for germinating microgreens in the way we do when we germinate seeds for growing mature plants.
But we do need to cover our microgreen trays with a weighted cover until we move them into the light. I think this is the best method of successfully germinating microgreen seeds.
By the way, for the best and most intense flavor, I recommend harvesting microgreens when you get a tiny set of true leaves.
Microgreen Trays for Growing on Tissue Paper/Paper Towels
If you’re growing microgreens on tissue paper or paper towels, then you’re pretty much saved from having to spend extra on the best microgreen trays. Check out my post on how to grow microgreens without soil if you want to know more about this method and others.
You can definitely buy some of the growing trays that I reviewed above if you want to and have the extra budget. But there’s an alternative.
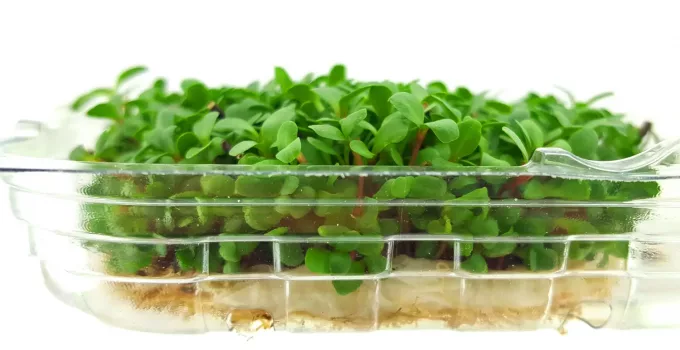
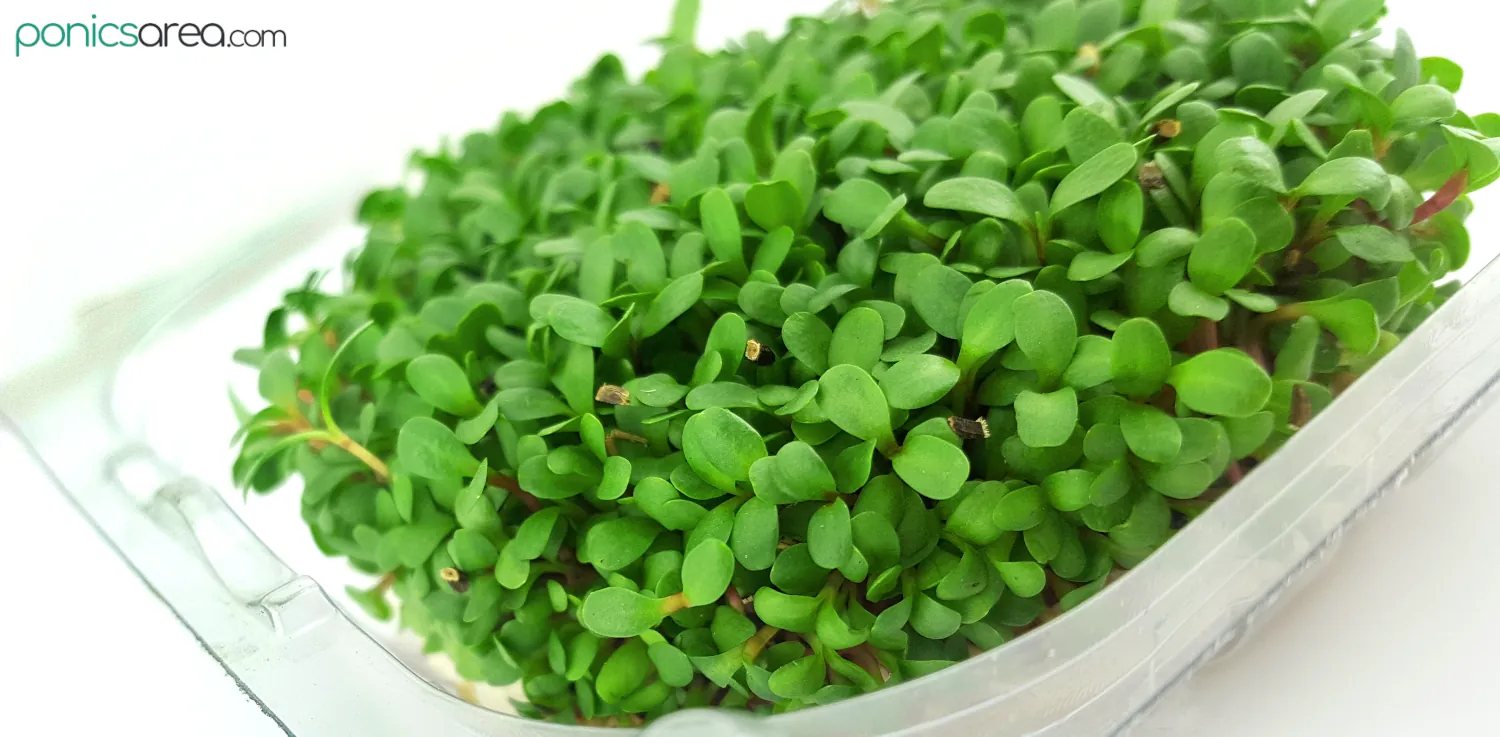
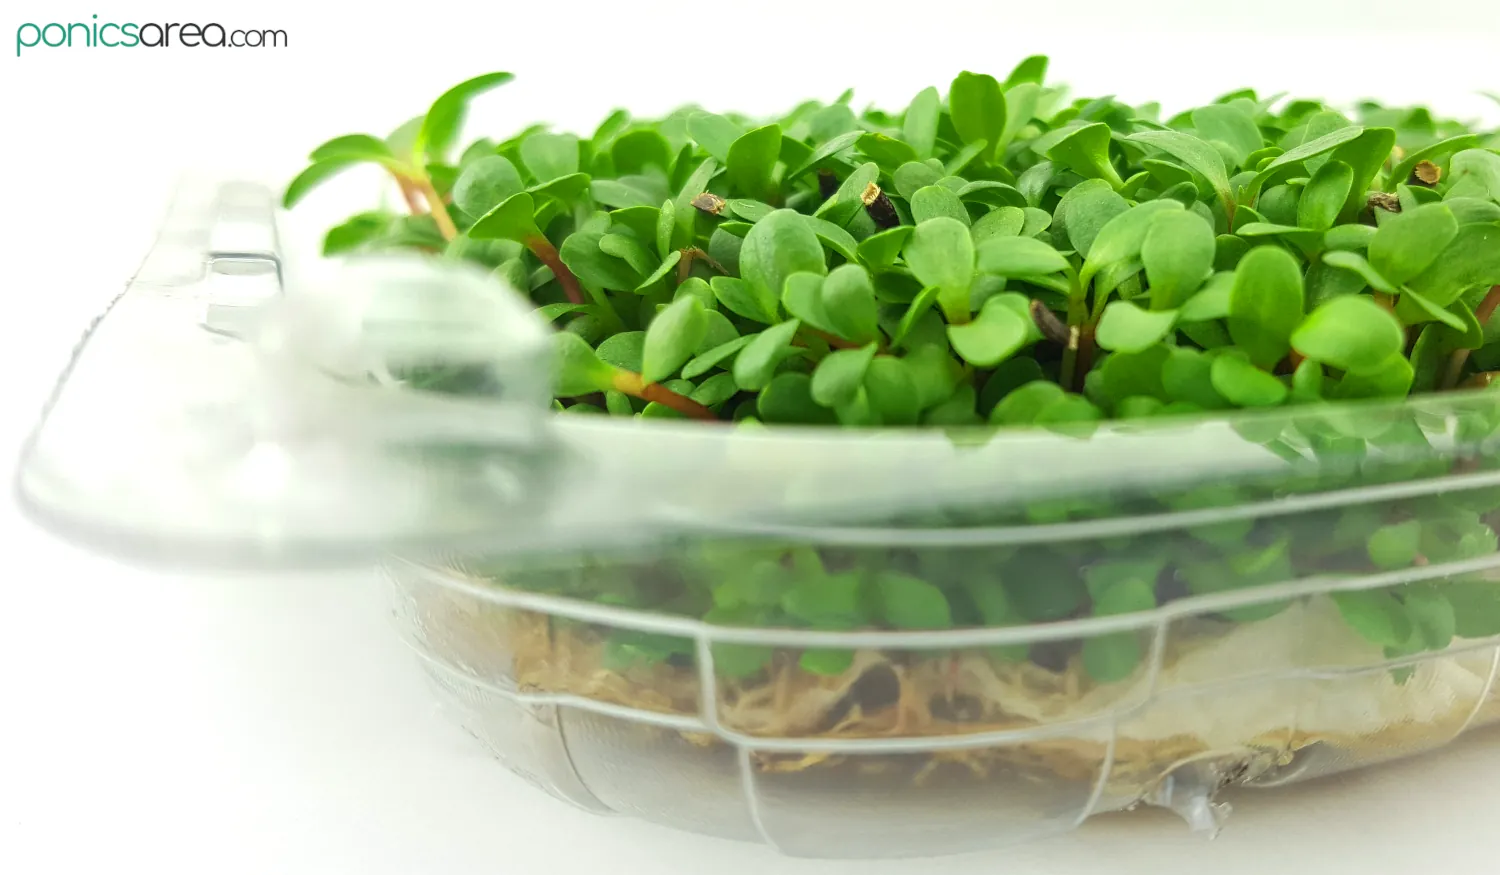
In the case of growing on paper towels, you can use the plastic boxes that fruits or vegetables are sold in. They’re very convenient to use because most of them have holes at the bottom and holes in the lid, which is perfect.
Or you can buy bigger transparent plastic clamshell food containers and put some holes in the bottom and the lid yourself.
The same food containers can be used as best microgreen trays even if you’re growing in soil or if you’re using hemp mats or coco coir compressed blocks or any other soilless growing medium.
Best Microgreen Trays FAQs
Let’s see what other questions I might have missed answering when it comes to finding the best microgreen trays.
Q. What kind of trays for microgreens?
The most popular are 1020 growing trays for microgreens. The inner dimensions are 10 inches in width and 20 inches in length. The outer dimension will vary, depending on manufacturer. You need to pay attention to those if you want to buy both no holes and with holes trays. If you’re growing microgreens in soil, a growing tray with holes will be paired with a tray with no holes for making the watering from the bottom much easier and much faster. If you’re growing hydroponic microgreens, you only need 1020 no holes growing trays.
Q. How deep should a microgreen tray be?
Depths of 1.5, 2.0 or 2.5 inches is what should you should be looking for in microgreen trays.
Q. Do you need holes for microgreen trays?
Most growers prefer to use microgreen trays with holes if they’re growing in soil. They will stack those trays with holes in trays with no holes. There’s one reason for this pairing: the watering from the bottom will be done fast and with no complications. You can pour a jar of water in the no hole tray and let the soil take what water it needs and deliver the needed moisture to the roots.
Q. Can you reuse microgreen trays?
If you’re buying durable microgreen trays, you can reuse them for many years to come. Growing trays with a 1.8 – 2.0 mm thickness are not cheap but the initial investment will last for many years to come. These are considered to be the best microgreen trays.
Q. How do you sterilize microgreen trays?
If you’ve only grown microgreens in the soil outside then you can simply rinse the trays off with a powerful water jet, let them sit in the sun for a day, and you’re good to start another crop. Now, for the more serious options. You can simply spray the microgreen trays with undiluted white vinegar, let it sit, and then rinse it off. The next option is to use food grade hydrogen peroxide, 10% H2O2. If you’re growing in a completely enclosed area, you can use a diluted bleach solution to spray the trays with: 1 tablespoon bleach (15 ml) in 1 gallon of water (3.8 L). The bleach solution is usually used when growers have problems with fungi or mold. Don’t forget to always spray the bottom of the trays and to dry them afterwards.
Q. How can I grow microgreens at home without soil?
You can grow microgreens at home without soil by using a hydroponic growing medium. One of the best options is growing on hemp mats. The yield can be compared with the yield of growing microgreens in soil. Also, with hemp mats, you don’t need to use nutrient solution. Another option, which is one of the cheapest, is using coco coir compressed blocks. But you will have to use nutrient solution. These are the best options for growing hydroponic microgreens. Either of these growing media should be placed in 1020 no holes growing trays. The other option is to grow on paper towels.
In conclusion
If you’re a household just experimenting with different methods to grow microgreens, like the paper towels method, then you can go for leftover plastic boxes from fruits and vegetables as your choice for the best containers for growing microgreens.
If you’re a business, you’ll want to invest in top quality best microgreen trays to maximize your yield and profits.


